Pages

Friday, November 30, 2012

Beautiful, fun braid!

At my salon we had a wedding party come in. This was one of my favorite hair styles I did that day. If you already know how to french braid that will be so simple!! It's one of those styles that you can wear in a wedding or with a cute pair of jeans and top. I love this one!!

1. Start with the hair dry with some products in it, any product that you like that will "dirty" the hair up.
Put the hair in hot rollers to give it some texture, once the hair is cooled in the rollers remove them.

2. Then determine what side you want the sloppy curls falling down on,( in this picture you can see the curls falling on the left side I section the hair off at the left ear and clipped it forward)
t
3. Start a french braid on the opposite side of the head.(in this picture it's right side) braid around the head along the bottom hair line, continue all the way around to the other side, stop picking up hair and adding it to the braid right behind the left ear.

4. Continue with a regular braid to the end of the hair, securing with a band. This is where you will go back and started pulling on the braid to loosen it and give it a soft look.

5. Take the long regular braid and rolled it up, tucked it inside (underneath the french braid) use bobby pins to secure it.

6. Take the curls that were pushed forward (on the left side) and loosely pinned them up to cover where the braid was tucked inside. the looser the better it creates a soft look.
this is the front view!! Thank you so much Alyssa for the pictures!

DIY wedding reception decorations

Setting a wedding budget is an important part of planning a wedding. Sticking to that budget is the hard part. Here are a few DIY reception decorations, to help you save money and sick to your budget.

1. Card box...
I purchased a plain brown box with a lid, here's the saving part I used the box for my shower, and the wedding!!  My shower theme was Totally 80's I covered it in paper and my friend Mindy (she also got ordained so she could perform our wedding ceremony, how awesome is she!!) used colored pencils and wrote 80's bands on it, like this one!! 

Then for the wedding I recovered it with my colors Pink and Brown glitter paper. I had some gems I hot glued them on and the D on the front of the box is a pin that I hot glued on.


2. Mason jars...
 have become really popular lately so I took advantage of this. If your mom is anything like mine she has a ton of these. We were married in a private ceremony on the beach, our reception was a month later, so I decide to bring a little of the beach into my theme. I filled all different sized mason jars with sand and placed all different shaped/sized white candles in them then sprinkled crushed sea shells on the top to look like these ones!!


3. The head table...
 I kept with the beach theme I wrapped star fish with ribbon and tied it around the big vase.  The 6.23.12  on the front of the table was a reused prop that I had made for our engagement pictures I cut the numbers out of black glittery foam and hot glued them onto a piece of binder twine. So again reuse reuse reuse!!!


I also made made the little signs where we sat. Want to talk about easy and inexpensive!!! I found a font on my computer that had little hearts on it, (It's on my other computer when I get on there I will let you know the name of it) typed out what I wanted them to say and used picture frames that I had laying around!!! 


(In this picture I had originally put ribbon on them to hang them on the chairs but I took them off and set them on the table) 
How cute is this saying!!! 

4. Glitter balls!!!..
Glitter was everywhere... I took paper lanterns, spray glue, and glitter and made these amazing balls!!! I also made brown ones too!! I then hung little battery operated flame less candles in them to illuminate them at dark


5. I bought a plain wooden D at Michaels craft supply of $2.00 used the left over spray glue and pink glitter and made a beautiful D. 


6. Monogrammed canvas!...
 I got pink glitter spray paint and sprayed the mounted piece of canvas. I got the bDm letters at Hobby lobby and covered them with the spray glue brown and gold glitter just like I did the lanterns and Big D. Once the canvas and letters were dry I hot glued the letters on the canvas. The circles are just punched out of extra paper from the card box. Keep all little scraps like this they always come in handy!!!! You can also see this in behind the head table in that picture!! 


7. Flower balls...
These were also hanging with the pink and brown glitter balls, these were very easy to make. I went to the dollar store and bought all of there white roses. I got small foam balls, some ribbon and hot glue. I pulled the heads off the roses, and hot glued them all around the balls, once the ball was covered I hot glued the ribbon to hang them with. To look like these ones!! 


8. Venue...
We had our reception outside at our house so our venue was free, we just got a tent, table and chairs. HUGE $$$ saver!!!

9. Food...
My parents gift to us was the food, my dad made BBQ ribs, BBQ chicken, ham, Roast beef and my mom did the salads, potatoes, veggies and deserts with help from my aunts. Another HUGE $$$ saver!! People commented that it was the best food they had ever had at a reception, heck yeah it wasn't nasty catered food that comes from boxes it was real homemade food!! 

10. Cake...
I also chose to make my own cupcakes instead of having someone make us a cake. Cupcakes are easy to make and, lets face it the cake is a big part of our budget, that we could use somewhere else like the DRESS!!!

I hope these post helped if you have any questions please feel free to ask!!! I will make another post on wedding day savings.  These are just a few of the things I did myself for the reception!!

xoxo Misty

Thursday, November 29, 2012

What to wear for professional pictures, and make up tips.

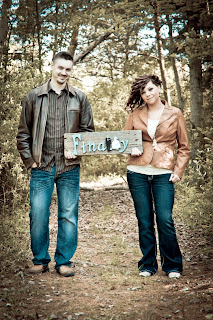
We had our engagement pictures taken in May this year and our pictures turned out amazing. Mostly because our photographer is the best, she is a creative genius! http://www.stephaniejphotography.com/  and the other part was knowing what to wear and how to apply make up that shows up in pictures and doesn't wash you out!
1. Choose clothing that is comfortable, we were laying in a ditch at one point.
2. Match each other but not to matchy matchy. Notice we wore neutrals, our coats were both brown, but Not the same exact brown.
3. Wear clothing that is timeless, don't wear the latest trends... Trends go out of style leaving your pictures looking dated in no time.
4. When applying make up wear more then you normally would. I had my eyes lined thicker and darker then I would normally do, wearing black eyeliner really makes eyes pop, in photos.
5. Contour under your cheek bones 2 shades darker then you're foundation, and apply blush to the apples of your checks, so your face doesn't get washed out.
6. Use a liquid foundation, then set it with a powder one.
Tip: If your guy isn't into getting his pictures taken, before you leave home have him drink a beer... Not a whole case just one to take the edge off. This really works!! Our scheduled 45 minute session turned into 2 hours because we were all having so much fun!!
Another Tip: Find a photographer who has the same style you do, talk to them look at there work. Just like anything you have to like there work and personality, to get the best results!! Remember to smile pretty and have fun.
Take a look at a few of our pictures, I hope this helped!




Wednesday, November 28, 2012

5k


In September I was playing around on Pinterest when I found a post saying things to do with your spouse. One of the things on the list was run a 5K together. As a joke I asked Brad if he wanted to run a 5K with me. Knowing his answer would be NO!! ~~You see I have never ran... nope not me, if you were to see me running you would probably want to run too because the only reason I would be running is because something awful was chasing me... Brad on the other hand plays basketball on men's leagues year round, he was also in the Army 4 years active 4 years inactive.~~ I was right his answer was NO!!! A few minutes later he looked at me and said, "if you want to run a 5K we can" I laughed and told him No really I was just joking. A few days later Brad had come home with a new pair of running shoes. Yup we were doing this!!! 

So my training began... I downloaded the Couch-2-5k app on my phone it's a 9 week routine. So I got a membership at the gym, and began running. It's funny some people say they get the desire to run, they become addicted, that never happened to me. LOL!!! I had to drag my hind end into the gym every day.

I found a run that was close to our town and signed us up. Since it's cold here in Michigan on November 10th I had to get some cute new running clothes, and that I did! Hey a girls got to look cute while gasping for her breath!! 

5 short weeks later Brad and I were ready for the race, lets just say it was awful!!! I hated every minute of it, that is until I was done. Then the adrenaline hit I have to admit I actually enjoyed it!! I didn't finish last but I also didn't finish first I was right in the middle, I'm good with that. The best part about this was that Brad and I did it together!! Brad stayed with me the whole time, the whole way encouraging me telling me how great I was doing!! 

When I seen run a 5k on the list of things to do with your spouse I though it was silly, but it was an amazing thing to do together, I would recommend it to any couple who want to try something new together. Something that pushes you to support the other!! 

So will we be running any other races together.... the answer is YES!!! In April I plan on running a 10K with Brad, he doesn't know that yet LOL!!! I am still using the app on my phone it's an awesome app that slowly builds up your stamina. Another plus is that my body has not looked this amazing in years!!! The dimples that I had on my legs... gone!!!  Now who would like that!! 


Tuesday, November 27, 2012

Yummy!!

I received this super simple 4 ingredient recipe from my friend @tofu_zombie for
Vegan No-flour peanut butter cookies
1 cup peanut butter
1 cup sugar (vegan sugar)
1 teaspoon vanilla
1 vegan egg replacer (Ener-G)
Mix all ingredients together then form into a ball press the balls with a fork on an ungreased baking sheet.
Bake at 350° for 10 minutes
Thanks Nicole they were AMAZING!